

Why people buy from your brand
Five key questions you should ask about your brand
-

- Allie Edgar Oct 5


Install Laravel Nova by following this step-by-step tutorial. This is the first of a four-part series about Laravel Nova which covers installation, creating a CMS, creating a CRM, and adding customization.
Laravel Nova is the missing admin panel for Laravel. It’s beautiful and easy to work with. Taylor Otwell himself is on the Nova development team and gave a solid introduction on Medium in July, 2018.
Nova makes Laravel even more powerful as a server-side framework by enabling you as a developer to easily create a customized admin area for your website or webapp. It naturally tracks in version control because configuration is set entirely in PHP classes and not in a database. In my opinion, we’ll soon see Nova admin panels built for the majority of Laravel sites because of its power and simplicity.
In response to numerous requests and questions about Nova, I compiled this short four-part series about Nova. Part 1 is an introduction to Nova and an installation guide. Part 2 shows how to build a simple content management system (CMS) using Nova. Part 3 teaches how to create a customer relationship management (CRM) tool with Nova. Lastly, part 4 shows some more advanced customizations and features of Nova. My codebase is publicly available on bitbucket here.
Before showing how to install Nova, why use Nova in the first place?
Sometimes you need a simple admin panel to download reports, send emails, search data, review graphs, or safely make database changes. If you have a Laravel webapp or website that needs light content management or light customer relationship management, Nova is a great solution. If you are already using Laravel Task Scheduling and/or Laravel Queues, Nova can enable an administrator to access and control those jobs. Nova respects Laravel Policies allowing you to customize the admin panel depending on who is logged in and what permissions they might have.
In this tutorial you can follow along every step, or checkout the final code from my repo on the part-1 branch. If you use the code base, you will still need a Nova license to get it working.
Although Nova is not free, it is usually worth it. At the time of this article, a license for a solo developer with annual revenue less than $20k is $99/site, and a pro license is $199/site. Head over to nova.laravel.com to register and purchase a license.
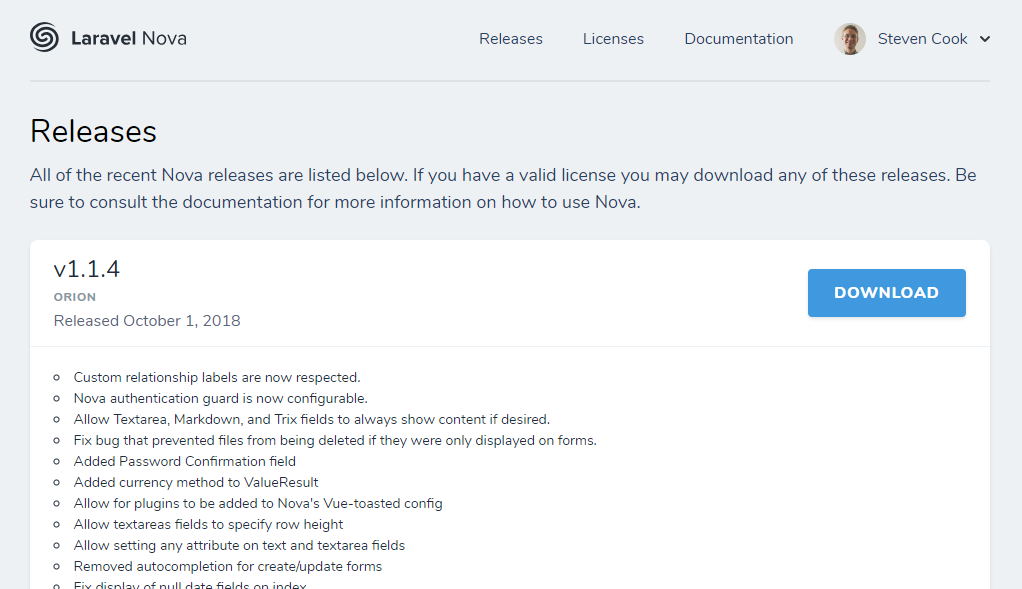
Once you have a license you will have access to the Releases page.
While you can download the files directly from the site, I prefer to install using composer. (Note: Nova only works for Laravel 5.6 or higher.) For this tutorial we’ll create a new Laravel project using Laravel 5.7:
composer create-project --prefer-dist laravel/laravel nova-demo
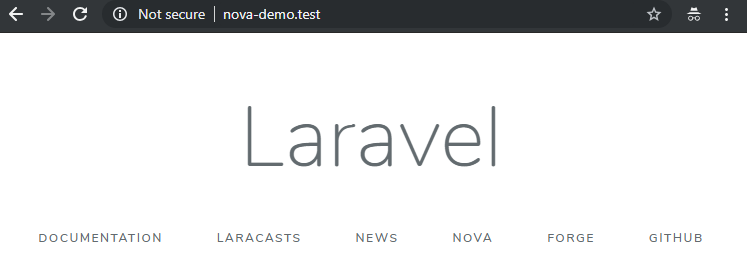
Set up your .env file with database credentials (and mailtrap credentials if you’d like). Once you’re done, navigate to your Laravel project to make sure everything is running correctly. I set mine up to use the local domain nova-demo.test through homestead.
Now we’re ready to install Nova. Open composer.json and add "laravel/nova": "~1.0", to require and https://nova.laravel.com as a repository. Here is the excerpt of the composer.json file when finished:
    ...
    "type": "project",
    "require": {
        "php": "^7.1.3",
        "fideloper/proxy": "^4.0",
        "laravel/framework": "5.7.*",
        "laravel/nova": "~1.0",
        "laravel/tinker": "^1.0"
    },
    "repositories": [
        {
            "type": "composer",
            "url": "https://nova.laravel.com"
        }
    ],
    "require-dev": {
        "beyondcode/laravel-dump-server": "^1.0",
        ...
With nova.laravel.com as a repository, composer will need to authenticate with nova.laravel.com to get the code it needs. Rather than type in your username and password every time you install or update composer, create a file called auth.json in the same directory as your composer.json file with the following content:
{
    "http-basic": {
        "nova.laravel.com": {
            "username": "yourUserNameGoesHere",
            "password": "yourPasswordGoesHere"
        }
    }
}
Your username and password are your email address and password used to log into nova.laravel.com. Now whenever composer needs to authenticate it will automatically use your credentials.
To finish up auth.json, since we don’t want to commit these credentials to the code repository (assuming you’re using git), add the string auth.json to your .gitignore file.
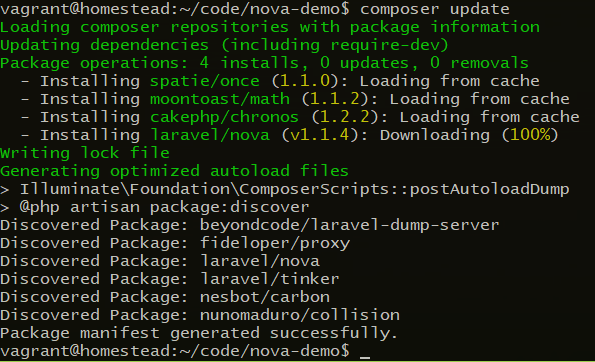
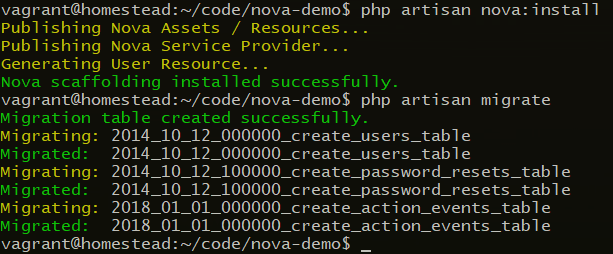
Now we’re ready to run the installation scripts. On the command line, run:
composer update
php artisan nova:install
php artisan migrate
My output looks like:
Lastly, open your config/app.php file and check the service providers array. The documentation suggests that the install process might automatically add App\Providers\NovaServiceProvider::class, to the providers array. It hasn’t seemed to work for me though. If you don’t see App\Providers\NovaServiceProvider::class then add it to the providers array.

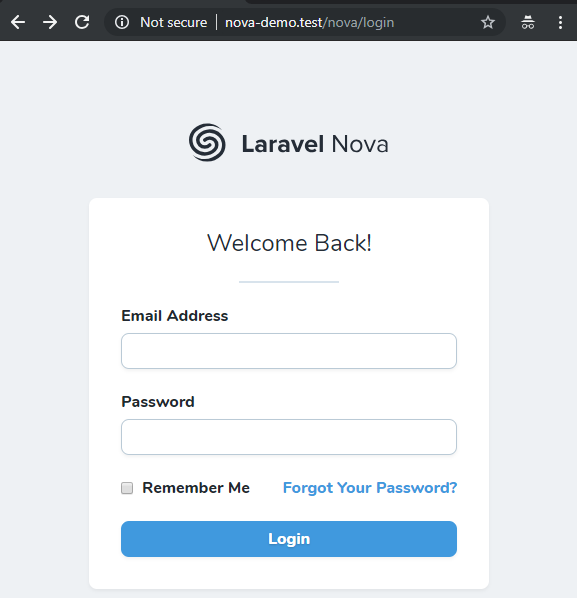
Finally, let’s see if everything worked. Navigate to /nova (in my case http://nova-demo.test/nova). If everything went well you should be directed to the login page and see this:
IF you would like to use a different URI than /nova/ you can modify this by editing config/nova.php. There you’ll find options for changing the admin path as well as a handful of other configuration options.
At this point we can’t log in because we don’t actually have a Nova user yet. Let’s create one. By default Laravel ships with a User model and Nova ships with a Nova User Resource. On the command line type:
php artisan nova:user
Enter a name, email and password to set for your application.
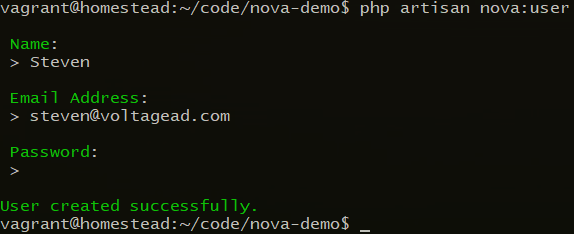
This just added a user with those credentials to Laravel’s users table. We could use any model for authentication so long as it extends Illuminate\Foundation\Auth\User as Authenticatable. Go ahead and enter the email and password you just set into the Nova login page. You should be logged in and redirected to the dashboard.
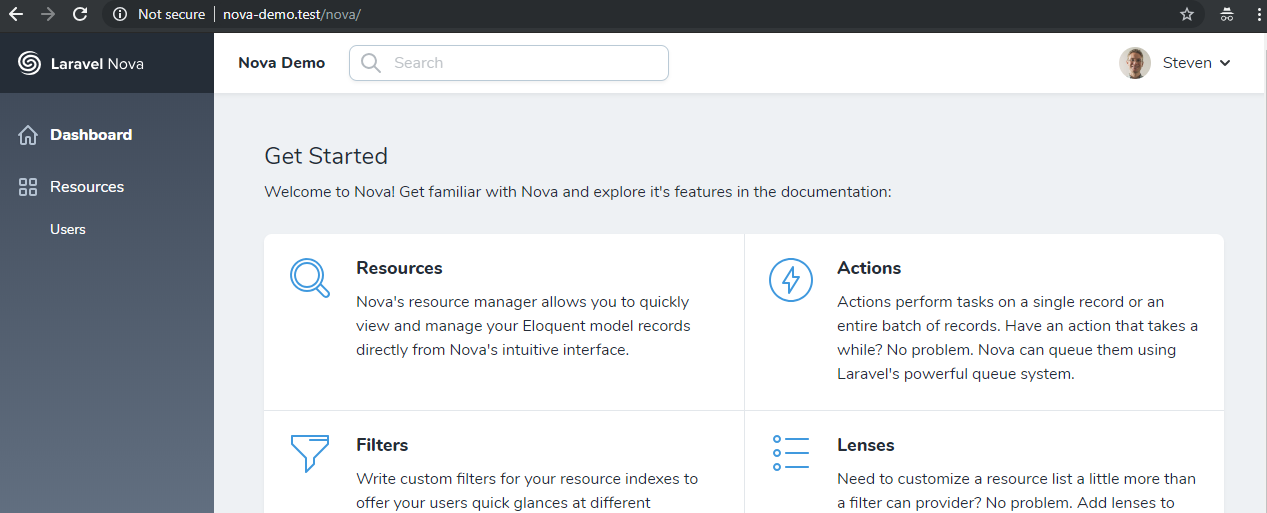
If you made it this far, Nova is installed and working! The dashboard has a clean design and is easy to use. Although the design is not responsive, we can make it responsive by using a Nova package. (More on this later.)
Notice that by default there is one menu link under Resources for Users. I mentioned that Nova ships with a Nova User Resource; this is found in app/Nova/User.php. Clicking on the Users link will show the User Resource.
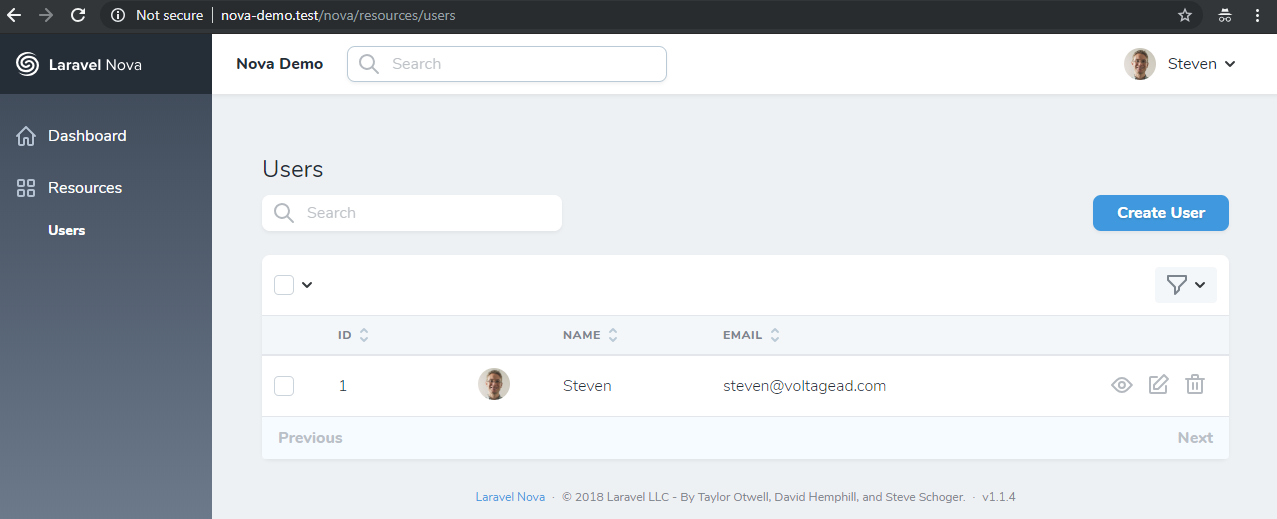
Out of the box you can view, edit, create, and delete Users.
In the next post titled Part 2: Creating a CMS we’ll look into Nova Resources and fields. Using this knowledge we’ll then create a lightweight content management system.
VOLTAGE is a creative agency specializing in giving your business a leg up in a performance driven world. Through brand design, creative strategy, and execution, we can drive results for your marketing.

Steven is the President and CTO at VOLTAGE. He is a technology enthusiast, a lifelong learner and a go-getter. He has a B.S. in Computer Engineering and a M.S. in Computer Science from Brigham Young University. He is an Eagle Scout and holds two patents. Steven believes in using creativity and technology to be a Force For Good.
View More Articles by StevenFive key questions you should ask about your brand

Shifting focus from the standard bottom line to the triple bottom line pays dividends (literally). We’re taking a look at 3 companies that prove businesses can make a positive impact on the world while driving profits.