

10 essential eCommerce integrations (that you can set up today)
Want to improve the functionality of your fashion and apparel site? Check out these easy-to-install options for enhanced security, analytics and more.
-

- Dave Barker Mar 29


In this tutorial we’ll create a simple webapp that demonstrates how to use Laravel Queues. We’ll look at database and Redis queue connections. We’ll see how Horizon can provide configuration and monitoring capabilities to queues. Lastly, we’ll set up a notification so we get a Slack message immediately any time a queued job fails.
Queues are useful for taking jobs, pieces of asynchronous work, and sending them to be performed by some other process. This is especially useful when making time-consuming API calls or calculations that you don’t want to make your web users wait for before being served their next webpage. For example, if a user creates a profile and we want to send them an email, rather than having the web application send the email synchronously and making the user wait to see a thank you message, we can simply queue the job and return to the user immediately.
Another benefit of using queues is that you don’t have to work the queues on the same server as your web application. If your jobs involve intensive computations, you don’t have to risk those jobs taking down or slowing your web application server for your users.
In this tutorial we’ll create a simple demo that shows how we can use queues in Laravel using the basic database connection. Then we’ll take a look at the Redis queue connection and some of its benefits. Next, we’ll use Horizon to incorporate some additional configuration and monitoring capabilities to our queues. Lastly, as a bonus, we’ll set up a notification system so we get a Slack message immediately any time a queued job fails.
Let’s start with a blank install of Laravel on Homestead. My homestead.yaml file is pretty basic:
---
ip: "192.168.10.10"
memory: 4096
cpus: 4
provider: virtualbox

authorize: ~/.ssh/github_rsa.pub

keys:
    - ~/.ssh/github_rsa

folders:
    - map: ~/code
      to: /home/vagrant/code
      type: "nfs"

sites:
    - map: queues.test
      to: /home/vagrant/code/queues/public

databases:
    - queues
There’s nothing special about my Laravel install. I ran composer create-project --prefer-dist laravel/laravel queues and updated my .env file to use the homestead database I specified: DB_DATABASE=queues.
Navigating to http://queues.test/, I see:
Before we set up queues, let’s put a model in place so we can better understand how queues work. From the command line let’s create an Order model:
php artisan make:model Order
We’ll need a database table as well:
php artisan make:migration create_orders_table --create=orders
Editing the ...create_orders_table.php file we just created, let’s add some fields, maybe a name and an item count like this in our up function:
        Schema::create('orders', function (Blueprint $table) {
            $table->increments('id');
            $table->string('name', 100);
            $table->integer('item_count')->unsigned();
            $table->timestamps();
        });
Of course, you probably wouldn’t put a name in an order table, but it will work for our demo. Now we can run our migration.
php artisan migrate
Let’s fill the order table with some random orders using a factory.
php artisan make:factory OrderFactory
Edit OrderFactory.php, change the Model class to the App\Order class and fill in the name and item_count with random data like this:
<?php

use Faker\Generator as Faker;

$factory->define(App\Order::class, function (Faker $faker) {
    return [
        'name' => $faker->name,
        'item_count' => rand(1,10),
    ];
});
Now let’s edit DatabaseSeeder.php and create some orders we can work with.
<?php

use Illuminate\Database\Seeder;

class DatabaseSeeder extends Seeder
{
    /**
     * Run the database seeds.
     *
     * @return void
     */
    public function run()
    {
        factory(App\Order::class, 50)->create();
    }
}
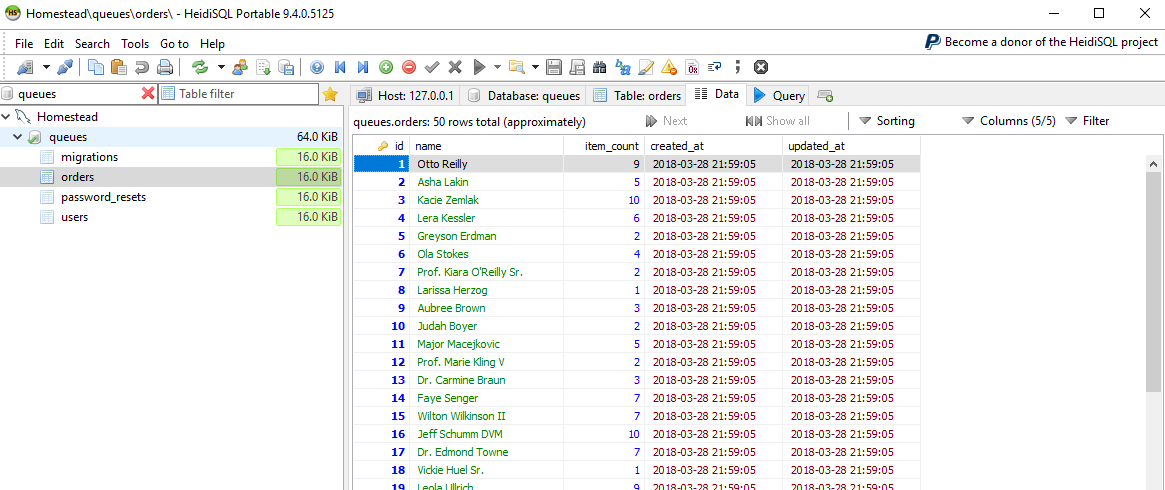
Now if we run our seeder, we’ll get 50 new orders added to the orders table.
php artisan db:seed
Look in the database and you’ll see something like this in your orders table:
Great, now that we have some underlying structure, let’s get mail set up. Our demo will show how to send mail as our queued job.
I’ll use mailtrap for this. If you haven’t used mailtrap, you can sign up for a free account.
Once logged in, you’ll copy your username and password over to the Laravel .env file as MAIL_USERNAME and MAIL_PASSWORD.
Now let’s create a Mailable:
php artisan make:mail OrderShipped --markdown=emails.orders.shipped
Edit OrderShipped.php to use App\Order. Let’s pass in an Order object and store it as a public variable. It should look like this:
<?php

namespace App\Mail;

use Illuminate\Bus\Queueable;
use Illuminate\Mail\Mailable;
use Illuminate\Queue\SerializesModels;
use Illuminate\Contracts\Queue\ShouldQueue;

use App\Order;

class OrderShipped extends Mailable
{
    use Queueable, SerializesModels;

    public $order;

    /**
     * Create a new message instance.
     *
     * @return void
     */
    public function __construct(Order $order)
    {
        $this->order = $order;
    }

    /**
     * Build the message.
     *
     * @return $this
     */
    public function build()
    {
        return $this->markdown('emails.orders.shipped');
    }
}
Now let’s modify the emails/orders/shipped.blade.php we generated like this:
@component('mail::message')
# Introduction

Thank you {{ $order->name }}.  We just shipped {{ $order->item_count }} items.

@component('mail::button', ['url' => ''])
Track Order #{{ $order->id }}
@endcomponent

Thanks,
{{ config('app.name') }}
@endcomponent
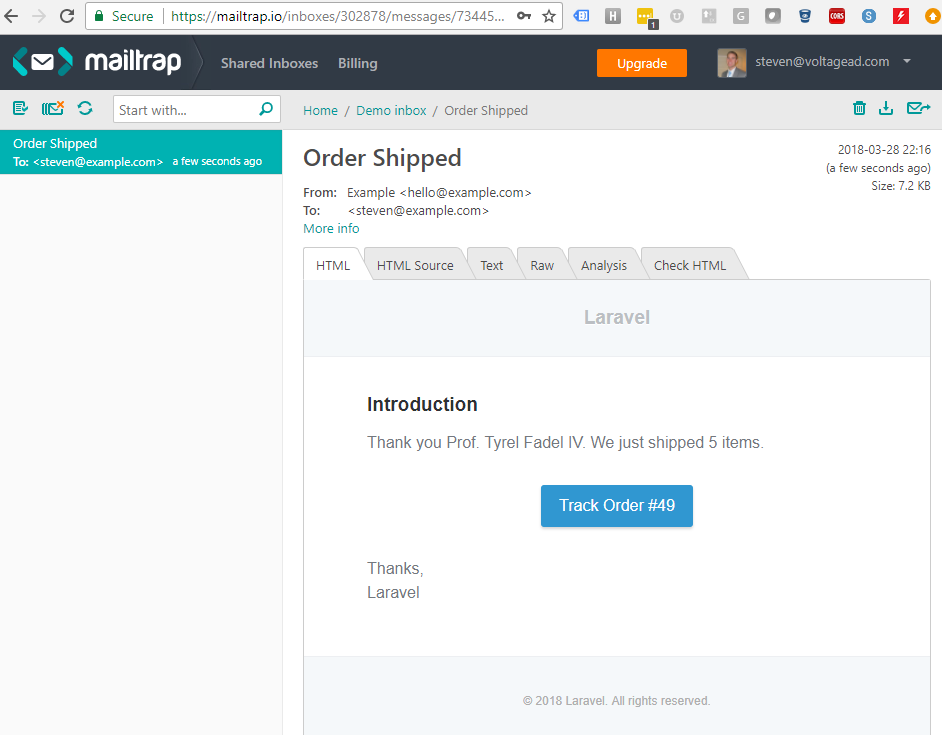
Now we can see some of the order data in the email including the order ID, name and item_count.
In order to send the email, let’s create a route and a controller. Edit routes/web.php and add this line:
Route::get('mail', 'MailController@index');
Now create a mail controller:
php artisan make:controller MailController
Create an index function so your controller looks like this:
<?php

namespace App\Http\Controllers;

use Illuminate\Http\Request;

use Illuminate\Support\Facades\Mail;
use App\Mail\OrderShipped;
use App\Order;

class MailController extends Controller
{
    public function index() {

        $order = Order::findOrFail( rand(1,50) );

        $recipient = 'steven@example.com';

        Mail::to($recipient)->send(new OrderShipped($order));

        return 'Sent order ' . $order->id;
    }
}
Now your MailController will find a random order (again, this is only for the sake of providing a queue demo) and mail it out. Navigate to http://queues.test/mail and you should see something like this:
Take a look in mailtrap and you should see your message. Mine looks like this:
Neat, we’re all set up. Our application can send mail, but it’s not using queues. To demonstrate how to use a queue, let’s create a job that can be dispatched to a queue.
php artisan make:job SendOrderEmail
Let’s pass in an Order instance to the constructor. Let’s also add some logging.
<?php

namespace App\Jobs;

use Illuminate\Bus\Queueable;
use Illuminate\Queue\SerializesModels;
use Illuminate\Queue\InteractsWithQueue;
use Illuminate\Contracts\Queue\ShouldQueue;
use Illuminate\Foundation\Bus\Dispatchable;

use Illuminate\Support\Facades\Mail;
use App\Mail\OrderShipped;
use App\Order;
use Log;

class SendOrderEmail implements ShouldQueue
{
	use Dispatchable, InteractsWithQueue, Queueable, SerializesModels;

	public $order;

	/**
	 * Create a new job instance.
	 *
	 * @return void
	 */
	public function __construct(Order $order)
	{
		$this->order = $order;
	}

	/**
	 * Execute the job.
	 *
	 * @return void
	 */
	public function handle()
	{
		$recipient = 'steven@example.com';
		Mail::to($recipient)->send(new OrderShipped($this->order));
		Log::info('Emailed order ' . $this->order->id);
	}
}
We can now rewrite our MailController to dispatch the SendOrderEmail job instead of sending the email directly.
<?php

namespace App\Http\Controllers;

use Illuminate\Http\Request;

use Illuminate\Support\Facades\Mail;
use App\Jobs\SendOrderEmail;
use App\Order;
use Log;

class MailController extends Controller
{
    public function index() {

        $order = Order::findOrFail( rand(1,50) );
        SendOrderEmail::dispatch($order);

        Log::info('Dispatched order ' . $order->id);
        return 'Dispatched order ' . $order->id;
    }
}
Re-run http://queues.test/mail and you’ll get another email sent successfully to mailtrap. You just used a queue! Now looking at your .env file you’ll see that QUEUE_DRIVER is set to sync. In config/queue.php you can see all the queue driver options: sync, database, beanstalkd, sqs, redis, null. Sync runs all jobs synchronously, in line using the running application, which is not very interesting. If you look in your log (laravel.log), you’ll see something like this:
[2018-03-28 22:22:18] local.INFO: Emailed order 20
[2018-03-28 22:22:18] local.INFO: Dispatched order 20
Interesting that the “Emailed” line got logged before the “Dispatched” line. That’s because all code ran synchronously. MailController.php dispatched SendOrderEmail which sent the email and logged “Emailed order” and then returned to MailController which then logged “Dispatched order.” This is a good time to check out Laravel’s documentation on queues.
Let’s use a real queue now. We’ll use the web application’s MySQL database. To do this, generate the queue table using artisan:
php artisan queue:table
php artisan migrate
That added a table called jobs where jobs will live until they are serviced by a queue worker. Let’s update our .env file to use the database. Change QUEUE_DRIVER from sync to database.
Now if you refresh http://queues.test/mail and check mailtrap, nothing will show up. Check out your jobs table though:

The job is ready for a queue worker to pick it up and process it. On the command line, you can run:
php artisan queue:work
My output looks like this:
vagrant@homestead:~/code/queues$ php artisan queue:work
[2018-03-28 22:35:35][1] Processing: App\Jobs\SendOrderEmail
[2018-03-28 22:35:36][1] Processed:  App\Jobs\SendOrderEmail
and the email is now in mailtrap. queue:work will continue to run until you kill it with CTRL+C. You can go ahead and kill it for now.
Of course you won’t want to SSH into your production server and run php artisan queue:work every time you want to process jobs. You would instead install Supervisor on your production machine running the queue to run the queue workers at all times. If the queue process dies for any reason, Supervisor will restart it. For the rest of this tutorial, however, we’ll manually run the queue so we can see exactly what is going on.
If you look into the jobs table now, it should be empty. Every time a job is processed, it is removed from the jobs table. What if something goes wrong? We’ll need a failed jobs table. Install it with artisan:
php artisan queue:failed-table
php artisan migrate
Now you have a failed_jobs table. What would cause a job to fail? If the job throws an exception then the job fails and is retried. Once the job has been retried for the max allowed limit of retries or of time, it can now be taken out of the queue and put into the failed_jobs table. Let’s manually recreate this.
Add this so it is the first line of the handle function of SendOrderEmail:
throw new \Exception("I am throwing this exception", 1);
That will of course throw an exception. Now let’s send another email by visiting http://queues.test/mail. This time, let’s add some more parameters to our queue workers. Run:
php artisan queue:work --tries=3
In the terminal you’ll see something like this:
vagrant@homestead:~/code/queues$ php artisan queue:work --tries=3
[2018-03-28 22:46:04][2] Processing: App\Jobs\SendOrderEmail
[2018-03-28 22:46:04][3] Processing: App\Jobs\SendOrderEmail
[2018-03-28 22:46:04][4] Processing: App\Jobs\SendOrderEmail
[2018-03-28 22:46:04][4] Failed:     App\Jobs\SendOrderEmail
If you look in the database you’ll see the failed job is no longer in the jobs table but is in the failed_jobs table.

Go ahead and kill queue:work with CTRL+C. Run the command:
php artisan queue:failed
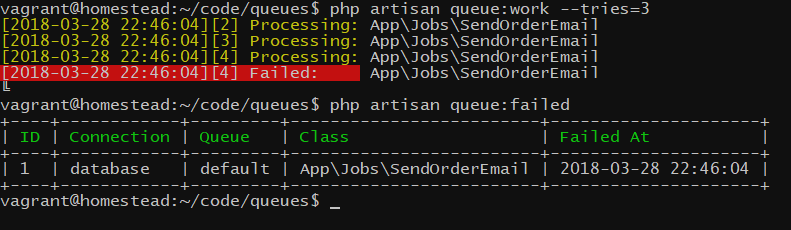
This shows all the failed jobs that are no longer in your queue. Luckily, if you resolve the exception you can re-add the job to the queue from the command line.
Go back to SendOrderEmail.php and remove the exception you added. Now on the command line run:
php artisan queue:retry 1
1 is the ID of the failed_job. This pushes the job back onto the queue. Work the queue again:
php artisan queue:work --tries=3
The job was now processed successfully and your email is in mailtrap!
Warning: When you start your queue worker (php artisan queue:work --tries=3), the application is loaded into memory and the process lives indefinitely until you kill it. This means that if you make a change in your application code (for example, you fix an exception), it will appear like your queue worker is still reading the old code (it’s in memory). You need to kill the queue daemon and restart it. I recommend restarting every time you deploy code. Even better, add a queue restart command to your deploy script to automate it.
Redis is simply another key-value, in-memory database, similar to MongoDB. You can read more about it on the Laravel website.
Luckily for us, Redis comes pre-installed on Homestead. If you need to configure it yourself, DigitalOcean has a good article.
You can verify that Redis is installed and working by calling on the command line:
redis-cli
ping
exit
You’ll need to install the PHP package so Laravel can access Redis. From the command line:
composer require predis/predis
Open your .env file and change QUEUE_DRIVER from database to redis. If you’re not on Homestead, there are additional configuration variables in config/database.php that you’ll want to look at.
If you refresh http://queues.test/mail and work the queue, you’ll see that emails are still sending to mailtrap.
Why use Redis for your Laravel queue connection? Redis offers clustering and rate limiting. Let’s look at an example of rate limiting and why that might be important.
Open up your SendOrderEmail job and update it to the following:
<?php

namespace App\Jobs;

use Illuminate\Bus\Queueable;
use Illuminate\Queue\SerializesModels;
use Illuminate\Queue\InteractsWithQueue;
use Illuminate\Contracts\Queue\ShouldQueue;
use Illuminate\Foundation\Bus\Dispatchable;

use Illuminate\Support\Facades\Redis;
use Illuminate\Support\Facades\Mail;
use App\Mail\OrderShipped;
use App\Order;
use Log;

class SendOrderEmail implements ShouldQueue
{
    use Dispatchable, InteractsWithQueue, Queueable, SerializesModels;

    public $order;

    /**
     * Create a new job instance.
     *
     * @return void
     */
    public function __construct(Order $order)
    {
        $this->order = $order;
    }

    /**
     * Execute the job.
     *
     * @return void
     */
    public function handle()
    {
        // Allow only 2 emails every 1 second
        Redis::throttle('my-mailtrap')->allow(2)->every(1)->then(function () {

            $recipient = 'steven@example.com';
            Mail::to($recipient)->send(new OrderShipped($this->order));
            Log::info('Emailed order ' . $this->order->id);

        }, function () {
            // Could not obtain lock; this job will be re-queued
            return $this->release(2);
        });
    }

}
In the line Redis::throttle('my-mailtrap')->allow(2)->every(1)->then( we are using the Redis::throttle command and passing in my-mailtrap. We could pass in any key we want. Redis will take and remember the key. In this instance, all code in our entire app wrapped with Redis::throttle using the my-mailtrap key will be limited to running only two times every one second, which happens to be the mailtrap rate limit for their free account. Why is this important? If we were to send more than two emails to mailtrap per second, mailtrap would respond with rate limit errors and not send our mail.
Most APIs have some sort of limit, either the number of calls you can make in a given duration (use Redis::throttle) or the number of simultaneous connections you can have to the resource at a time (use Redis::funnel). Very useful! Let’s test this out in a bit, once we’ve installed Horizon.
Laravel Horizon provides a dashboard for monitoring your queues, and allows you to do more configuration as code relating to your queue.
Install it by requiring the package. Then publish the configuration:
composer require laravel/horizon
php artisan vendor:publish --provider="Laravel\Horizon\HorizonServiceProvider"
Look in the config/horizon.php file. At the bottom are your environments. The environment key must match the APP_ENV variable in your .env. For example, I have APP_ENV=local, so my application will use the local settings. I updated my local settings to the following:
        'local' => [
            'supervisor-1' => [
                'connection' => 'redis',
                'queue' => ['email', 'sms'],
                'balance' => 'auto',
                'processes' => 6,
                'tries' => 3,
            ],
        ],
Now, instead of using the default queue, I have two queues, one named email and one named sms. I also have six queue worker processes, and each queued job will retry three times before failing.
Balance options are simple, auto and false. Simple splits jobs evenly between queue worker processes. Auto adjusts the number of worker processes depending on which queue is the biggest. False will not balance queues; whichever queue a job is dispatched to will run the job.
Let’s be specific about the way we dispatch to our queues. Update MailController to look like this:
<?php

namespace App\Http\Controllers;

use Illuminate\Http\Request;

use Illuminate\Support\Facades\Mail;
use App\Jobs\SendOrderEmail;
use App\Order;
use Log;

class MailController extends Controller
{
    public function index() {

        for ($i=0; $i<20; $i++) { $order = Order::findOrFail( rand(1,50) ); if (rand(1, 3) > 1) {
                SendOrderEmail::dispatch($order)->onQueue('email');
            } else {
                SendOrderEmail::dispatch($order)->onQueue('sms');
            }
        }

        return 'Dispatched orders';
    }
}
This is purely for demonstration purposes. We find 20 random orders and for each one there’s a ⅔ chance we’ll dispatch it to the email queue and a ⅓ chance we’ll dispatch it to the sms queue.
Let’s go ahead and start working the queue, but instead of using queue:work we can use:
php artisan horizon
Now we can finally test our rate-limiting code by visiting http://queues.test/mail. This will instantly queue up 20 emails. Redis will only process two per second which should keep your usage below the threshold. You’ll see two pop into mailtrap every second until all 20 are in.
Horizon comes with a dashboard for monitoring your jobs. Let’s check it out. Edit your AppServiceProvider.php file so it looks like this:
<?php

namespace App\Providers;

use Illuminate\Support\ServiceProvider;
use Laravel\Horizon\Horizon;

class AppServiceProvider extends ServiceProvider
{
    /**
     * Bootstrap any application services.
     *
     * @return void
     */
    public function boot()
    {
        Horizon::auth(function ($request) {
            // Always show admin if local development
            if (env('APP_ENV') == 'local') {
                return true;
            }
        });
    }

    /**
     * Register any application services.
     *
     * @return void
     */
    public function register()
    {
        //
    }
}
This allows you to access the dashboard when your APP_ENV is set to local. Make sure php artisan horizon is running in your terminal. Now navigate to http://queues.test/horizon.

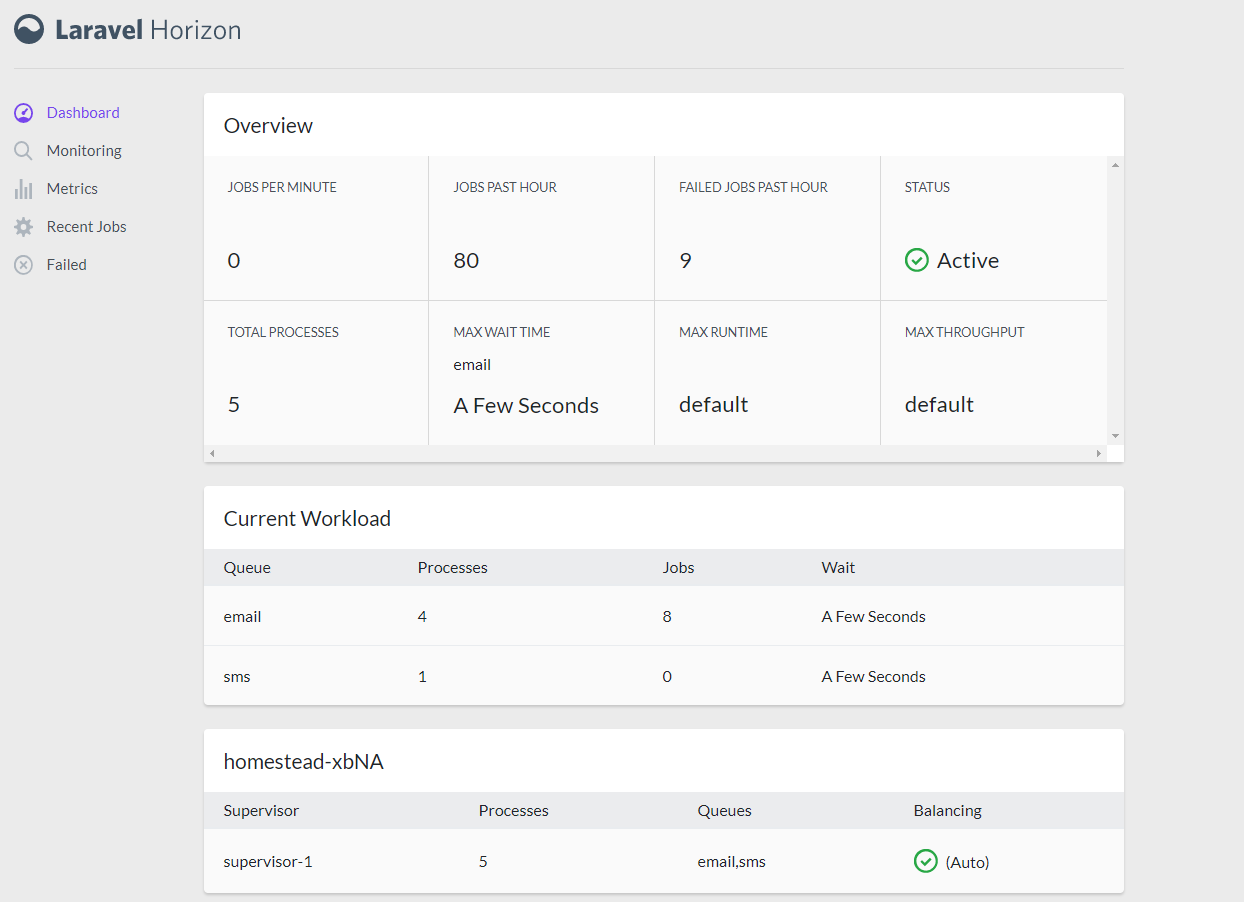
If you refresh http://queues.test/mail and watch the http://queues.test/horizon/dashboard page, you’ll see the number of jobs on the two queues jump way up. The number of processes assigned to “email” and “sms” will also adjust depending on which queue has more jobs. Here’s a screenshot showing how four processes ended up helping with email because there were eight jobs on that queue.
Lastly, if you’d like to see graphs of how your queues are doing, add this line to your app/Console/Kernel.php:
$schedule->command('horizon:snapshot')->everyFiveMinutes();
If a job fails, you’d probably want to know about it immediately. I have my applications slack me when something fails so I can check it out. We can accomplish this using Laravel Notifications. Feel free to check out the documentation here.
First head over to your Slack account. As an administrator, click on Manage Apps. Click on Custom Integrations. Click on Incoming WebHooks and then Add Configuration. This is where you can choose which channel your Laravel app will post to. Copy the Webhook URL and add it to your .env file:
SLACK_WEBHOOK=YourWebHookURLGoesHere
SLACK_CHANNEL=#YourSlackChannelGoesHere
Next you’ll need guzzle:
composer require guzzlehttp/guzzle
Now create a notification class:
php artisan make:notification JobFailedNotification
Update JobFailedNotification to look like this:
<?php

namespace App\Notifications;

use Illuminate\Bus\Queueable;
use Illuminate\Notifications\Notification;
use Illuminate\Contracts\Queue\ShouldQueue;
use Illuminate\Notifications\Messages\SlackMessage;

use Log;

class JobFailedNotification extends Notification
{
    private $event;

    /**
     * Create a new notification instance.
     *
     * @return void
     */
    public function __construct($event)
    {
        $this->event = $event;
    }

    /**
     * Get the notification's delivery channels.
     *
     * @param  mixed  $notifiable
     * @return array
     */
    public function via($notifiable)
    {
        return ['slack'];
    }

    /**
     * Get the Slack representation of the notification.
     *
     * @param  mixed  $notifiable
     * @return \Illuminate\Notifications\Messages\SlackMessage
     */
    public function toSlack($notifiable)
    {
        Log::info('Sent slack notification for order #' . $this->event['id'] . ' for ' . $this->event['name']);

        return (new SlackMessage)
                    ->from(My Webapp)
                    ->to(env('SLACK_CHANNEL'))
                    ->image('https://placeimg.com/48/48/any')
                    ->error()
                    ->content('Queued job failed: ' . $this->event['job'])
                    ->attachment(function ($attachment) {
                        $attachment->title($this->event['exception']['message'])
                                   ->fields([
                                        'ID' => $this->event['id'],
                                        'Name' => $this->event['name'],
                                        'File' => $this->event['exception']['file'],
                                        'Line' => $this->event['exception']['line'],
                                        'Server' => env('APP_ENV'),
                                        'Queue' => $this->event['queue'],
                                   ]);
                    });
    }
}
Notice that we are sending this notification just to Slack. In the toSlack function we can set the Slack image, the from name, the message and various fields. We could also send a file attachment if we had one.
Next we’ll hook into the Queue::failing event. In AppServiceProvider.php we’ll add the Queue::failing event, extract the failed job data and pass it into our JobFailedNotification like this:
<?php

namespace App\Providers;

use Illuminate\Support\ServiceProvider;
use Illuminate\Queue\Events\JobFailed;

use App\Notifications\JobFailedNotification;
use Laravel\Horizon\Horizon;
use Notification;
use Queue;

class AppServiceProvider extends ServiceProvider
{
    /**
     * Bootstrap any application services.
     *
     * @return void
     */
    public function boot()
    {
        Horizon::auth(function ($request) {
            // Always show admin if local development
            if (env('APP_ENV') == 'local') {
                return true;
            }
        });

        // Send notification to Slack when a job fails
        Queue::failing(function (JobFailed $event) {

            $eventData = [];
            $eventData['connectionName'] = $event->connectionName;
            $eventData['job'] = $event->job->resolveName();
            $eventData['queue'] = $event->job->getQueue();
            $eventData['exception'] = [];
            $eventData['exception']['message'] = $event->exception->getMessage();
            $eventData['exception']['file'] = $event->exception->getFile();
            $eventData['exception']['line'] = $event->exception->getLine();

            // Get some details about the failed job
            $job = unserialize($event->job->payload()['data']['command']);
            if (property_exists($job, 'order')) {
                $eventData['id'] = $job->order->id;
                $eventData['name'] = $job->order->name;
            }

            // Send slack notification of the failed job
            Notification::route('slack', env('SLACK_WEBHOOK'))->notify(new JobFailedNotification($eventData));

        });
    }

    /**
     * Register any application services.
     *
     * @return void
     */
    public function register()
    {
        //
    }
}
To test this, let’s modify our MailController.php so our for loop runs just once instead of 20 times:
for ($i=0; $i<1; $i++) {
And then edit SendOrderEmail.php and manually throw an exception as the first line of the handle function:
throw new \Exception("I am throwing this exception", 1);
Be sure to restart Horizon so the queue daemon will load your updated application code.
php artisan horizon
Finally, we can refresh our page
http://queues.test/mail
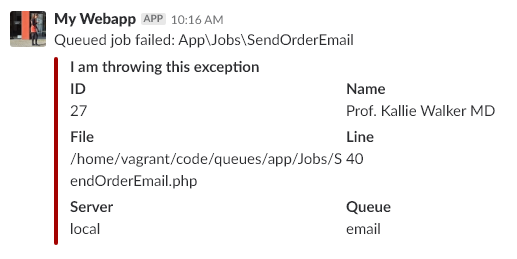
The job fails after three tries and this Slack notification shows up in the specified Slack channel:
VOLTAGE is a creative agency specializing in giving your business a leg up in a performance driven world. Through brand design, creative strategy, and execution, we can drive results for your marketing.

Steven is the President and CTO at VOLTAGE. He is a technology enthusiast, a lifelong learner and a go-getter. He has a B.S. in Computer Engineering and a M.S. in Computer Science from Brigham Young University. He is an Eagle Scout and holds two patents. Steven believes in using creativity and technology to be a Force For Good.
View More Articles by StevenWant to improve the functionality of your fashion and apparel site? Check out these easy-to-install options for enhanced security, analytics and more.

Fly fishing is a lot like working in eComm. Seriously. Allow us to explain: